Here we have articles on topics the HipMonster team wants to share. This is anything from our favorite pizza restaurant to a really interesting website.
Above is a photo the entrance to St Ignatius located in the heart of the Sunset district in San Francisco.
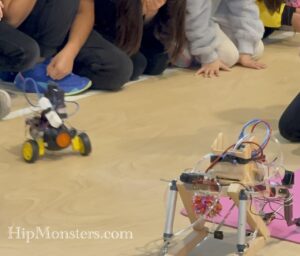
Below is a video showing one set of the robotic competition.
The goal is for your team to finish as many tasks as possible before the time runs out. Each team has three robots: two that are focused on competing tasks and one that tries to disrupt the other team’s robots. The court is divided in two with each team having one side as their home where they perform their tasks. The tasks are placing the tubes in a slot, throwing a ball and lifting themselves up at the end of the round.
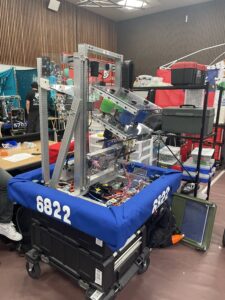
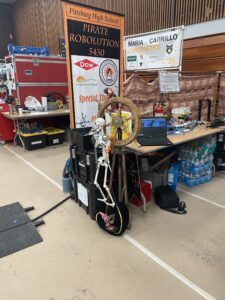
Here is a close up of one of the robots, number 6822. It is amazing to see how many different and creative designs the teams come up with. For example, some receive the tubes from feeding machine while others scoop them up from the floor.
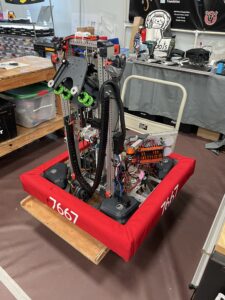
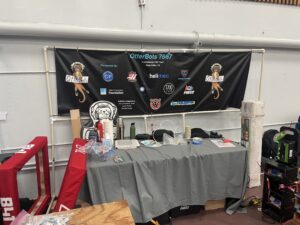
Here is another robot, 7667, waiting to be serviced.
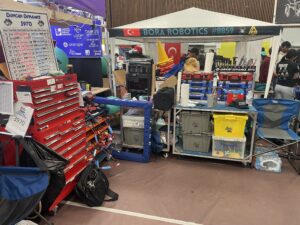
Above is a photo of a typical repair station. Like with the robots, each team has their own layout and collection of tools optimized for their robot’s design. We had serious tool envy as we walked through the pit.
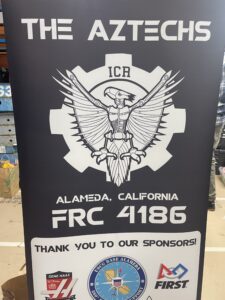
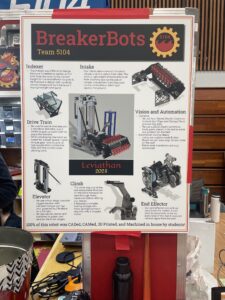
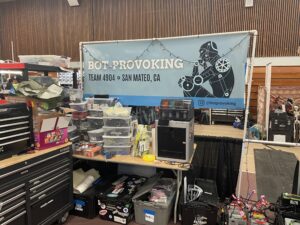
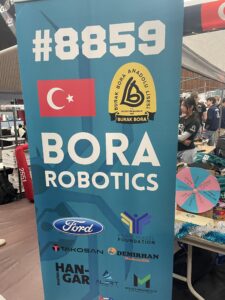
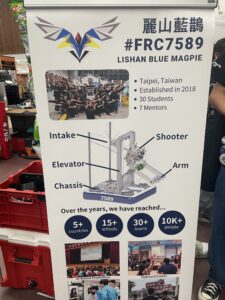
While none of our photos have people, the event was crazy crowded. We made sure to exclude people when taking photos, so missed about half of the teams at the events. Below is a sample of some of the teams there.
The Otter Bots.
The Aztechs from Alameda, California.
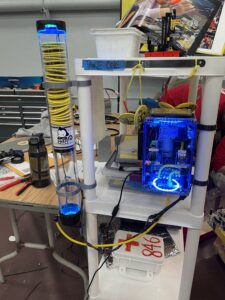
And team 846 with the absolute coolest pin dispenser ever!
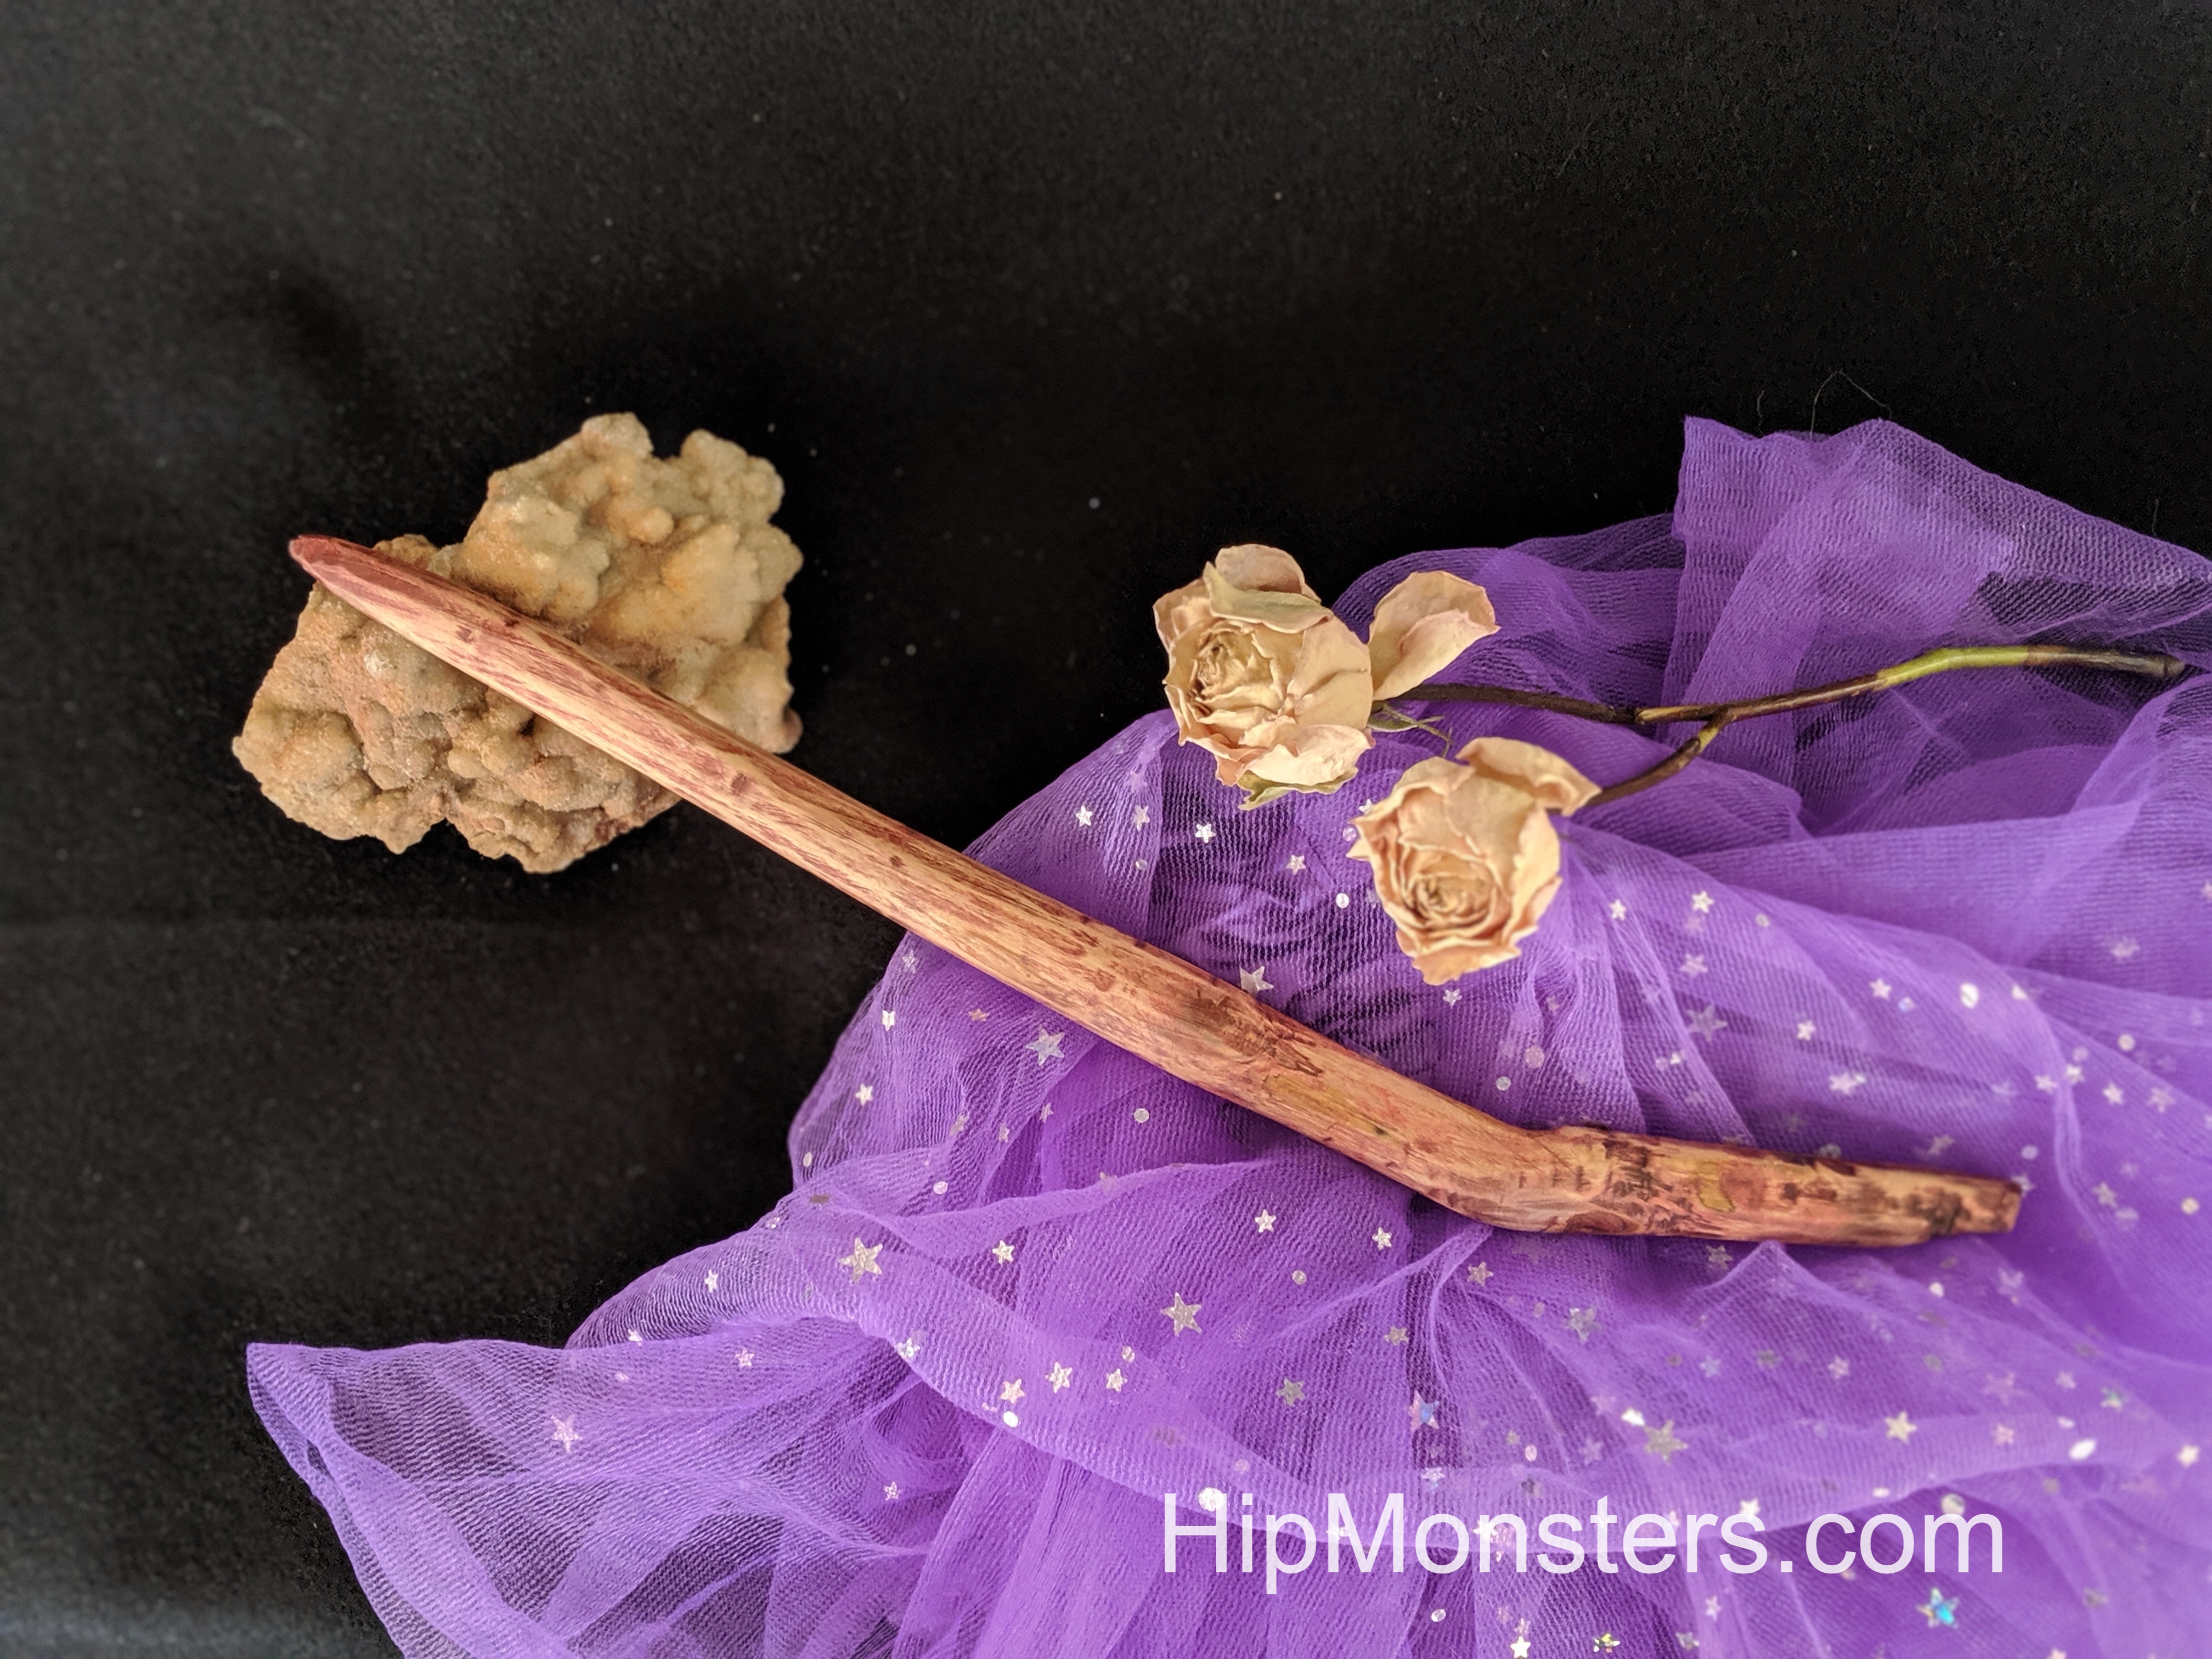
We make wands to relax and to practice our woodworking skills. The process usually involves spokeshaving, sanding, staining, and waxing the wood. We always use wood from our yard to make the wands extra unique. Here is a selection of some of our wands!
This piece of wood had a handle that bends that was very difficult to spokeshave, but turned out very well. We stained it red and brown then sanded the wood for the marbled finish.
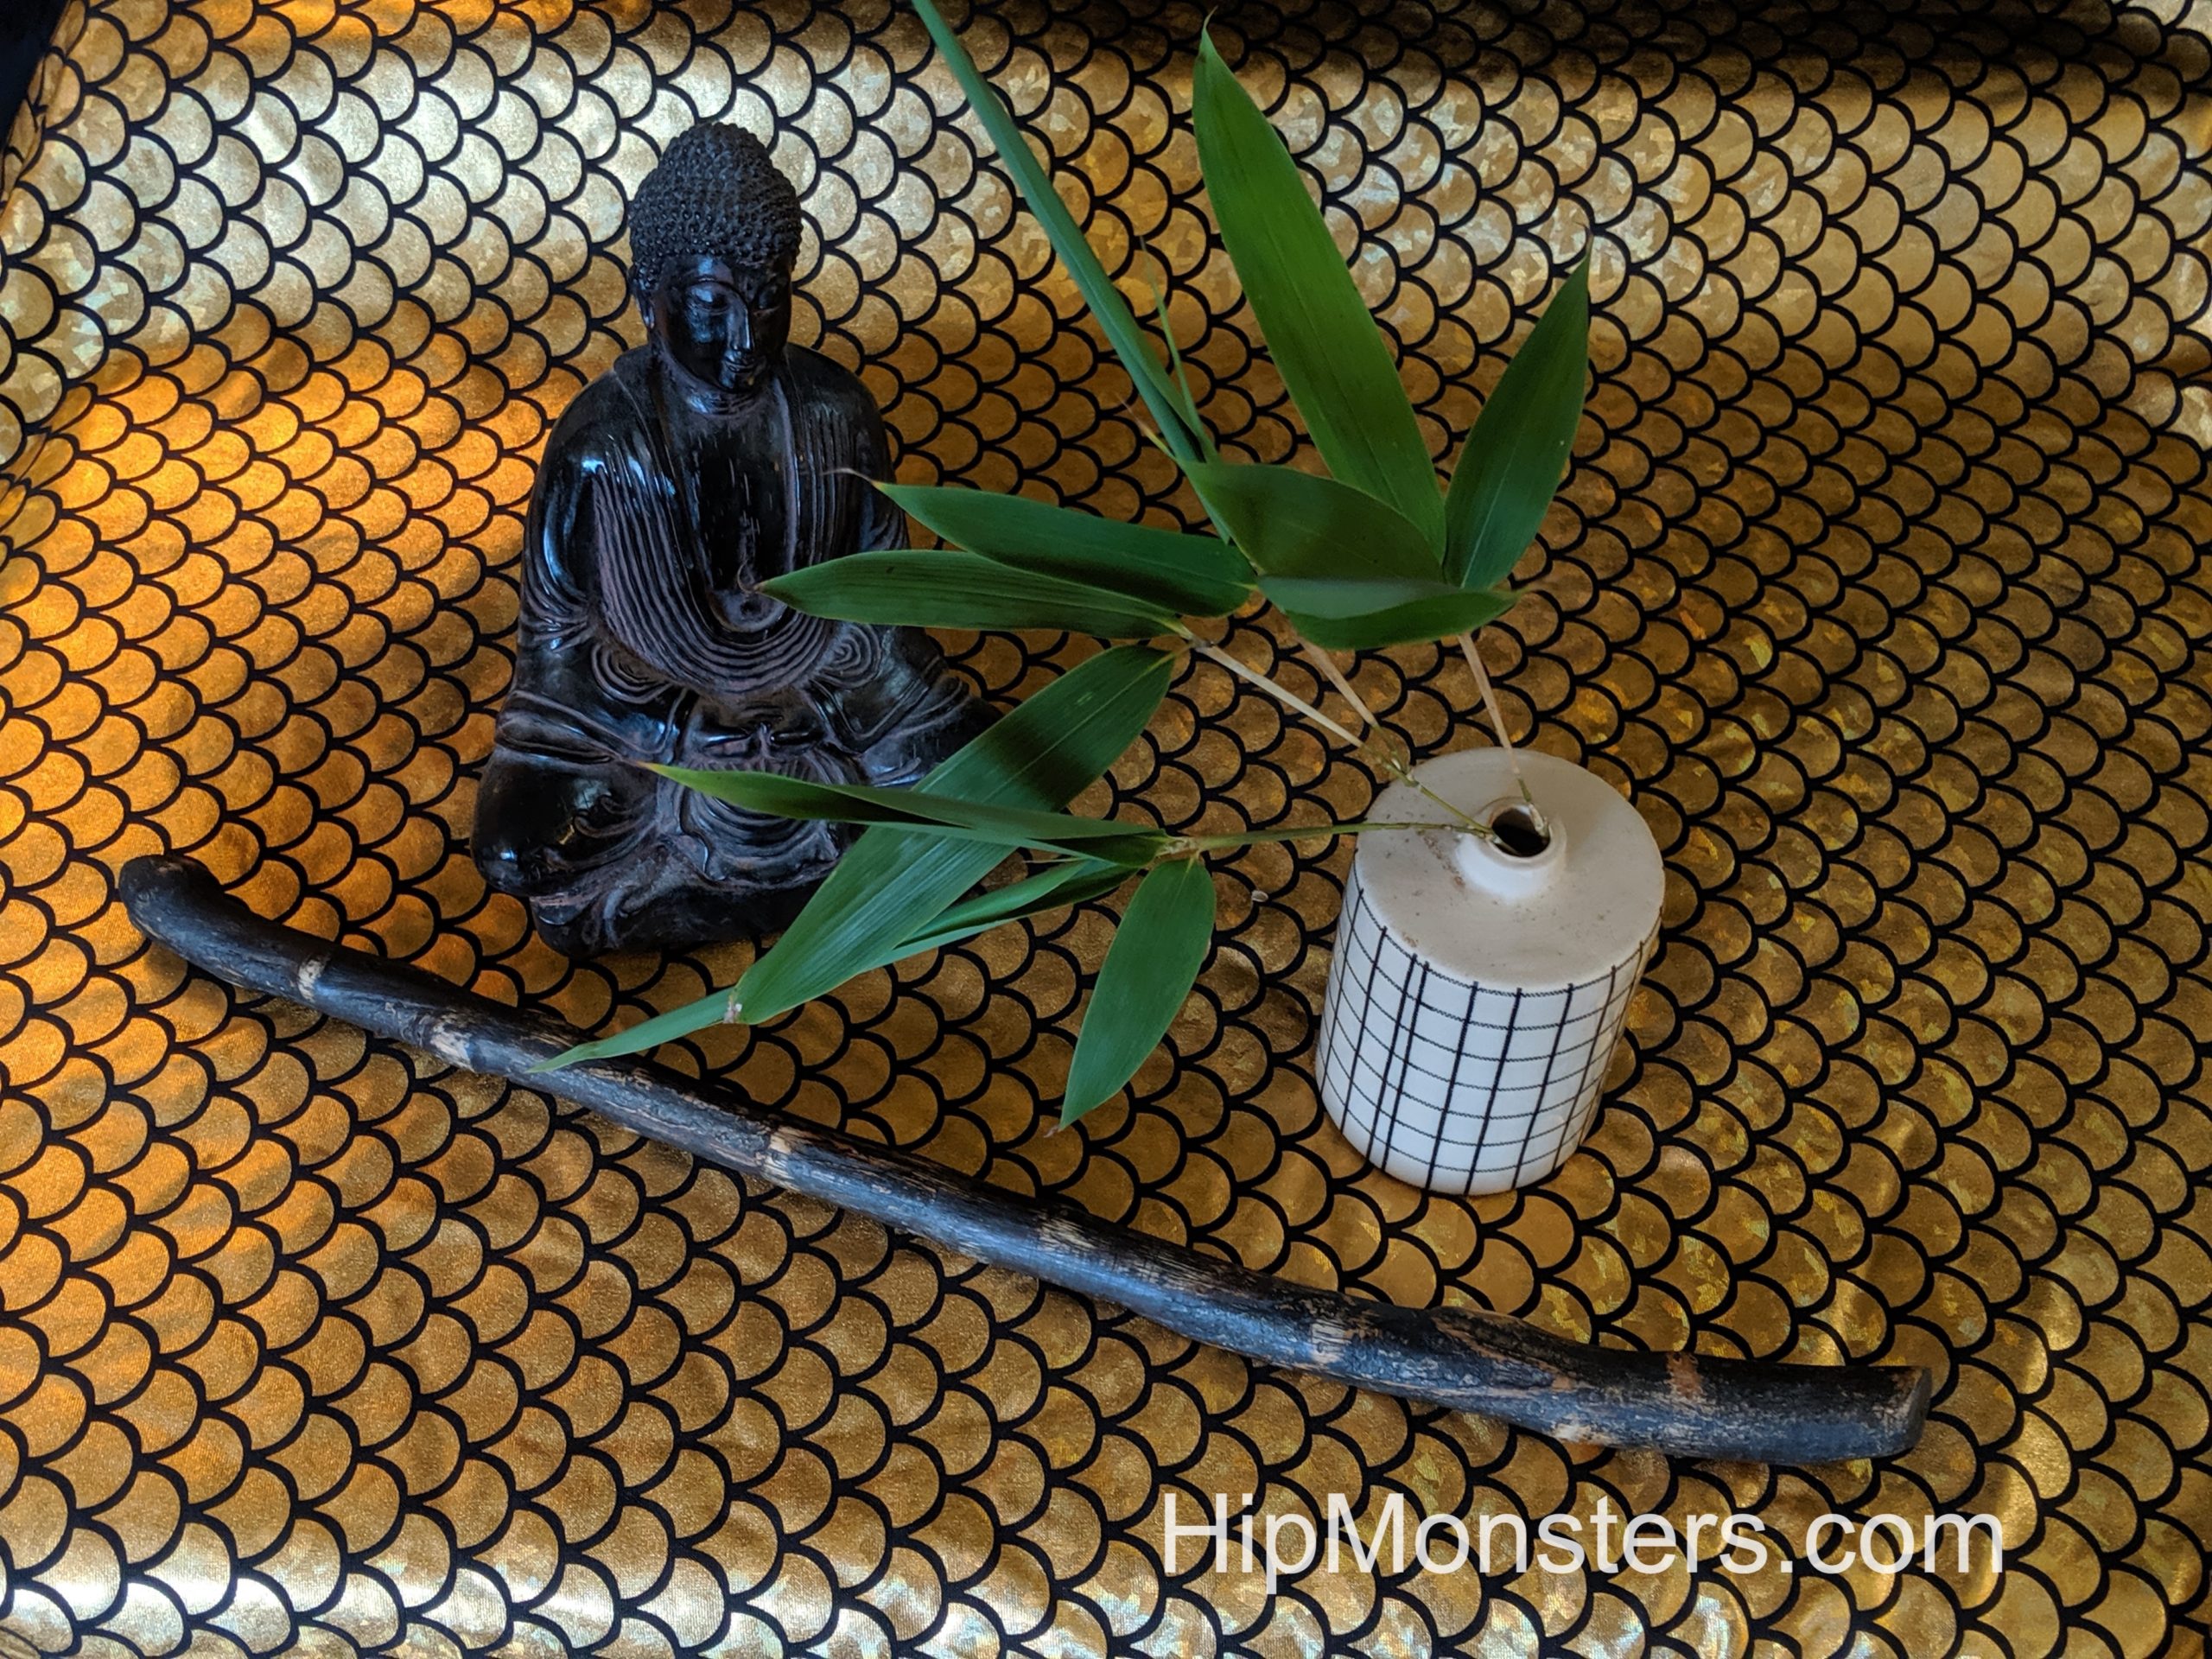
Unusual for us, this wand is made from bamboo. Instead of spokeshaving, we just sanded this wand to maintain the classic look of the bamboo. The black color of the wood is natural, not stained.
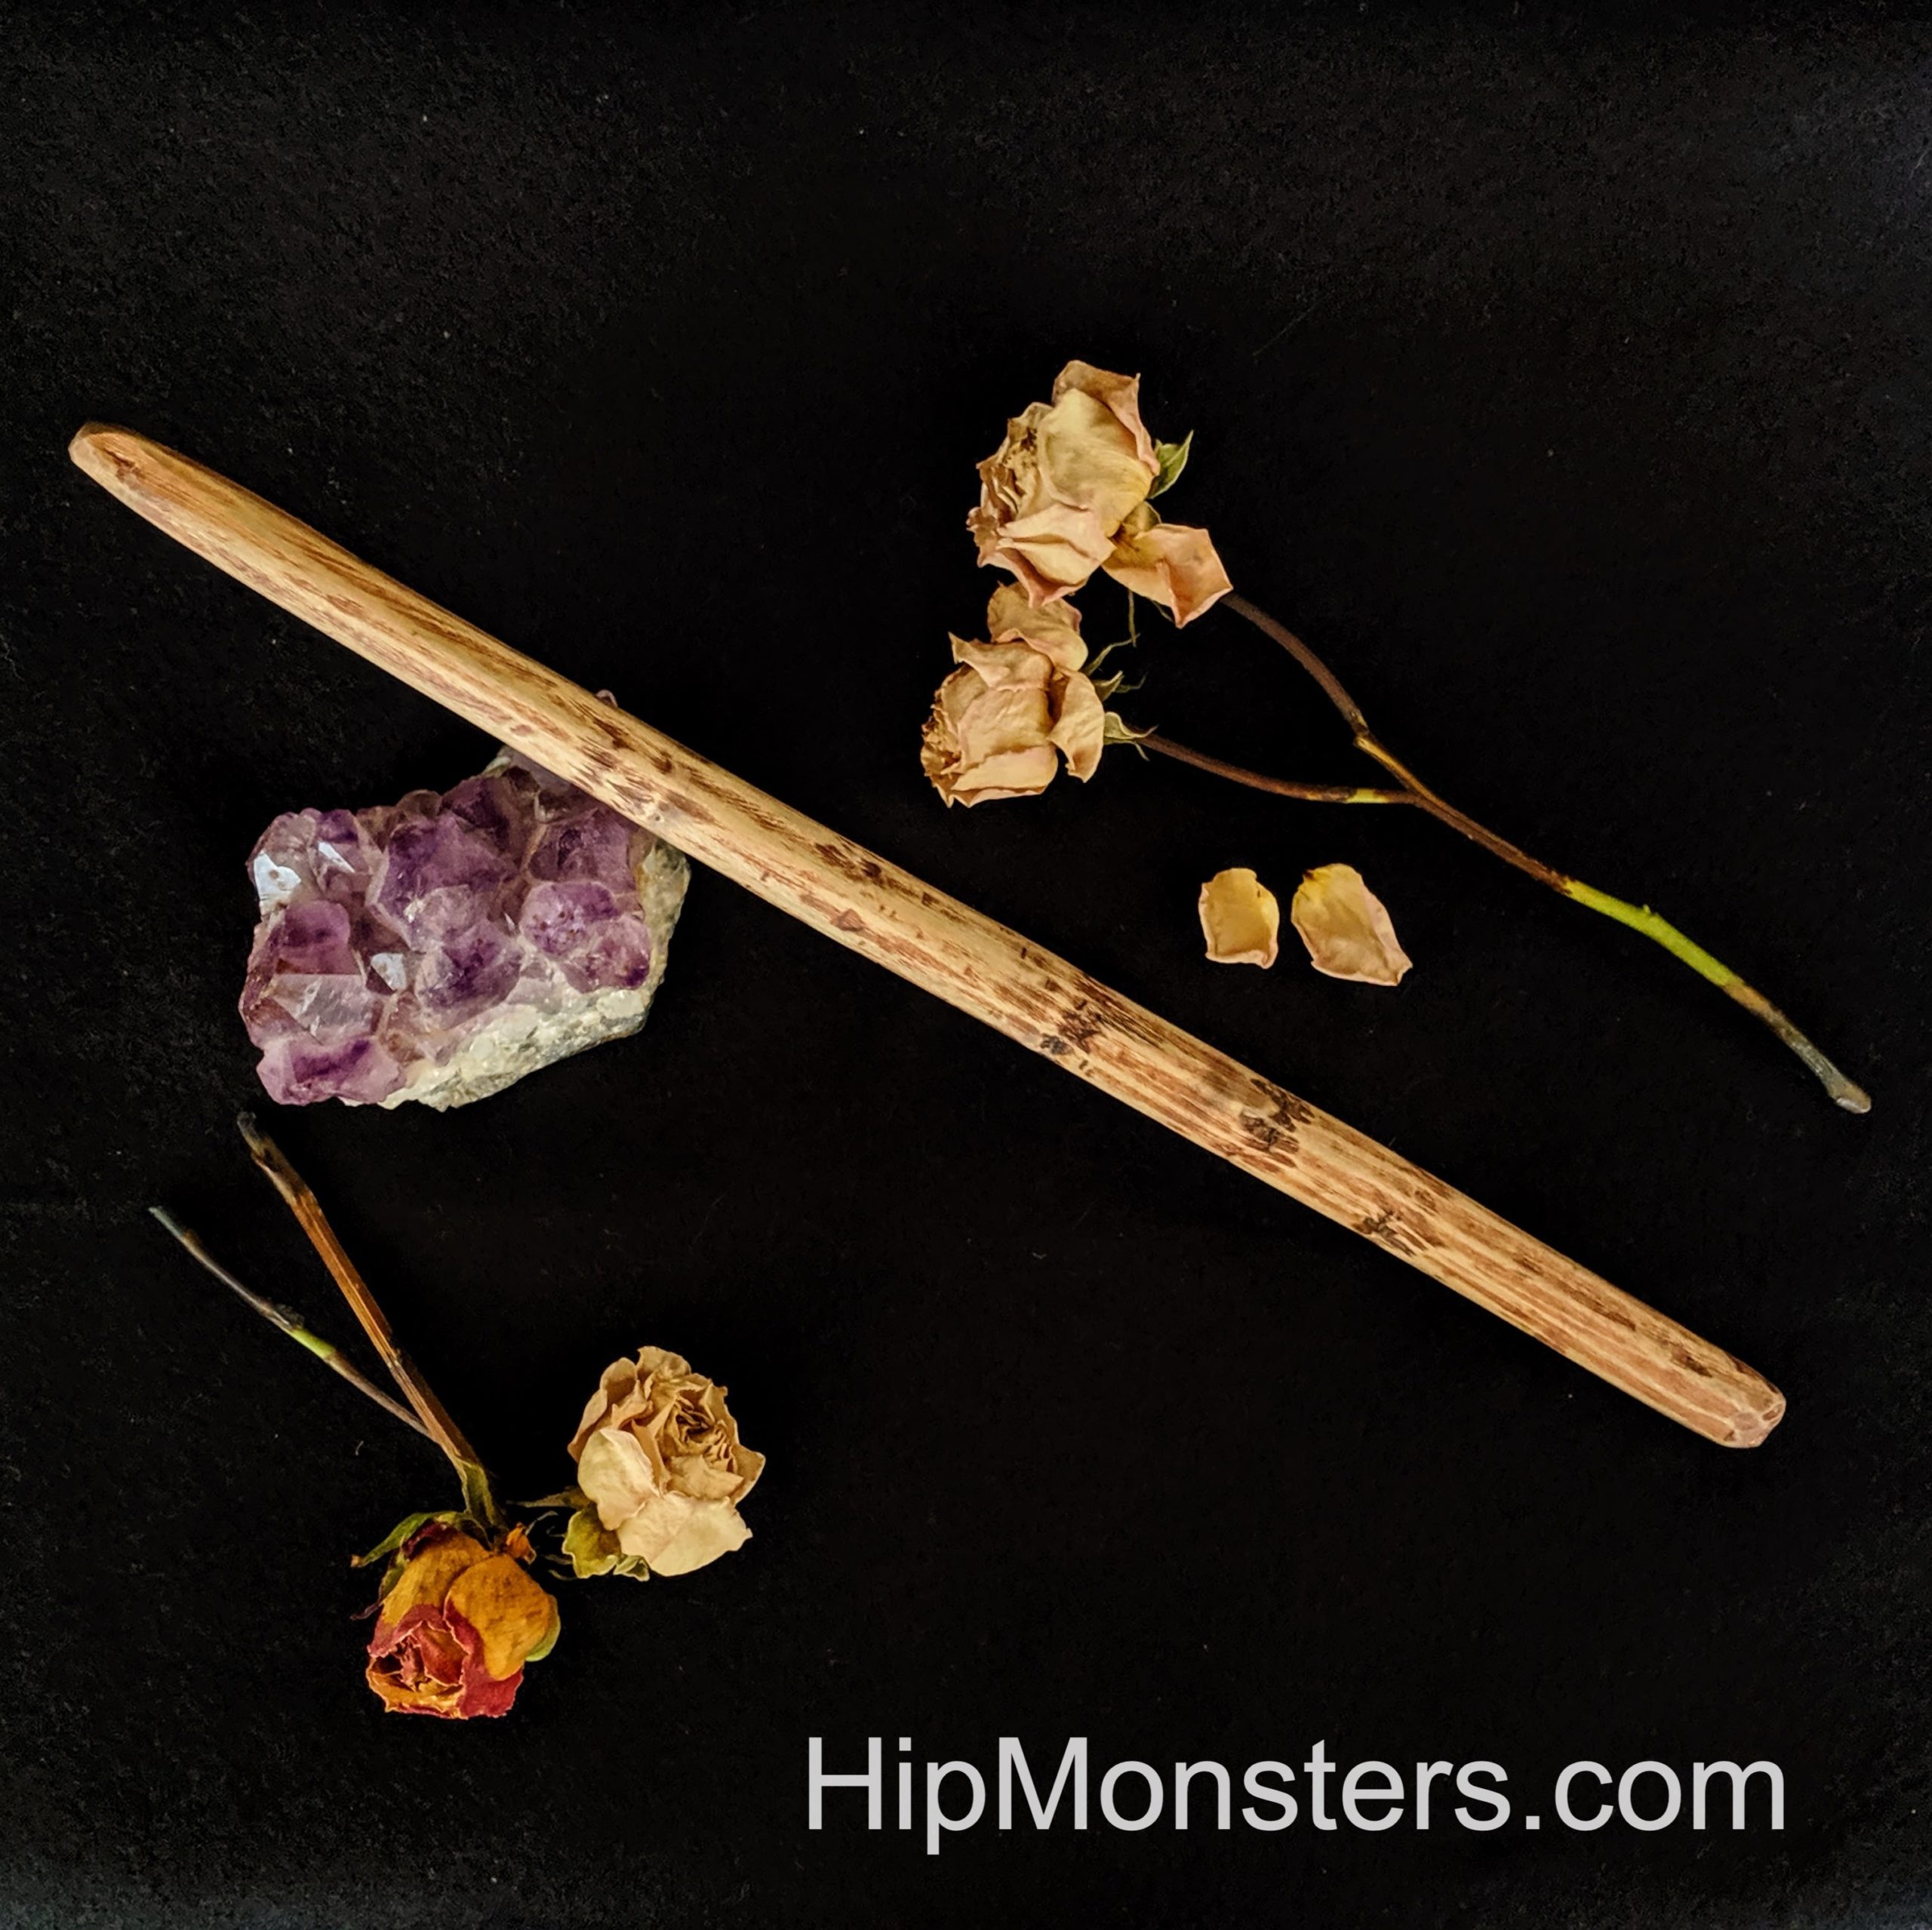
This wand is nice and strait. We spoke shaved it smooth and stained it mahogany to add a pop of color. This wand was also sanded to have a smooth finish.
Whenever we go to Valencia Street in San Francisco, we always go to one of our favorite stores called Paxton Gate. An eye catching store that is full of interesting natural wonders and oddities.
When we go in Paxton Gate we always will stay there for a very long time, because there is so much to see and explore!
Here are some interesting rocks and minerals, including opal, aragonite, and bismuth! We love to pick out some new and interesting rocks to add to our rock collection.
Here are some more rocks! We love looking at and picking up all of the different rocks. One particular favorite is a desert rose crystal. We like then because they are very beautiful and remind us of a rose. We also love bismuth because it reminds us of Gunnerkrigg Court.
Here are some animals and other random curiosities that are preserved in glass. There is even a human brain in a jar!
These are animals displays and animal figurines. We love to look through all of the animal figurines to try and find our favorite animals.
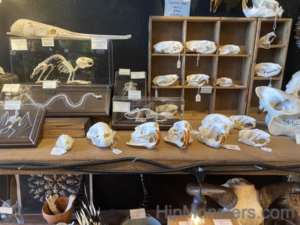
These are some cool skeletons and bones of different animals, including the skull of a muskrat.
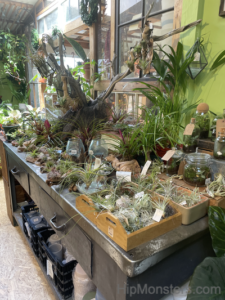
Paxton Gate also has a variety of plants. We love to hang out in the plant section to try and find a new addition for the yard.
More plants! The weirder the plant the better. We love to have odd looking plants in our garden.
Here are some fossil trilobites, ancient creatures that lived in the ocean. There are a variety of sizes. We are especially interested in them because trilobites are the family sign for the Heterodyne family in Girl Genius.
Here are some glass eyes used for taxidermy which we find creepy but cool.
These strange stones are actually owl pellets! Owl pellets are undigested food that an owl would regurgitate.
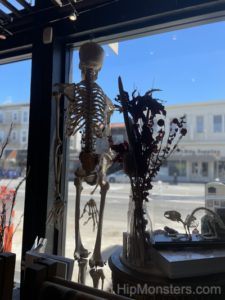
And a friendly skeleton watches over the store while you explore!
As we are getting for ready for this year’s SF Fan Expo, we wanted to post about last year’s fun! We enjoyed all the fandom at the expo (Doctor Who, Star Trek and more) but given our Star Wars cosplay theme this year, we decided to highlight Star Wars.
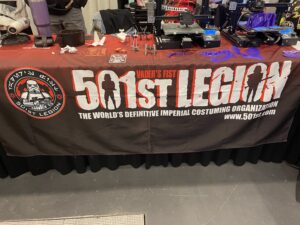
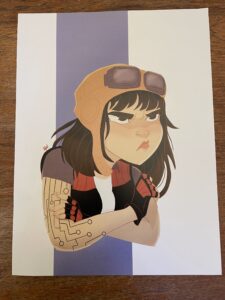
First, a special call out to the 501st Legion who very quickly recognized one of the HipMonster’s crew cosplaying as Doctor Aphra (one of out all time favorite characters).
The 501 Legion gives advice on how build you own weapons, helmets, and even toys using 3d printers. If you want to print your own Storm Trouper helmet, they will set you on your way!
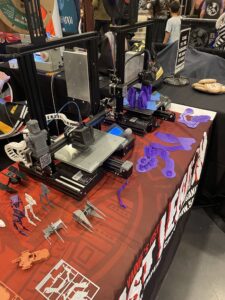
Here are a few of their 3-D printed toys. The 501 Legion is not only about cosplay and 3-D printing, they also do charity work across the Bay Area.
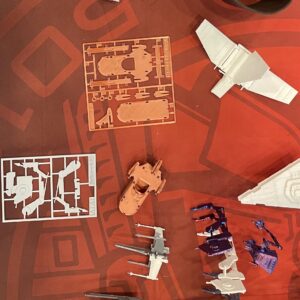
Here are some of the 3-D printed kits. If you are a Star Wars fan make sure to swing by their booth this year!
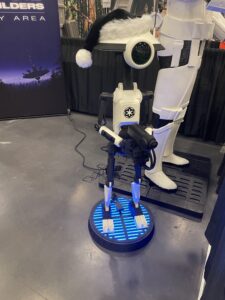
If you want your own droid, the Droid Builder Bay Area is the best place to get started. They create life-size droids that look exactly like in the movies. This club of like-minded droid makers are always open to a new member.
This cute little robot can easily be 3D printed at home!
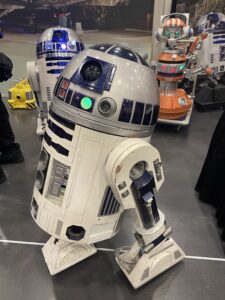
The star of the show was the R2D2s which all looked identical to the one in the movies. We would love to put our AI in one of those machines!
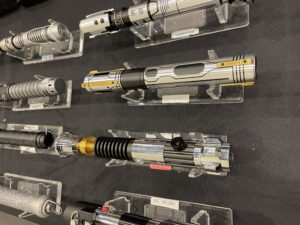
If the Force is in you, then it is about time you picked up a lightsaber. The FanExpo had several vendors ready to equip Jedi and Sith alike! We loved HookedOnSabers, who lets us examine and try a few of the lightsabers out, even when we were not going to buy one.
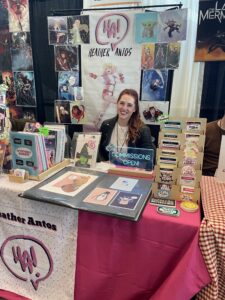
As huge Doctor Aphra fans, we were thrilled that Heather Antos was attending! She was an editor on the first Doctor Aphra series and helped bring her to life! Heather Antos was a lot of fun and we even got some inside information from her about the making of Doctor Aphra, and recommendations of other great series!
Here is how I feel thinking how long I have to wait to this year’s Fan Expo.
We also want to give a shout out to comic book writer Jody Houser who signed every scrap of paper we shoved in front of her.
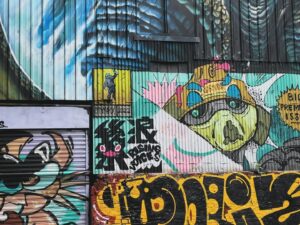
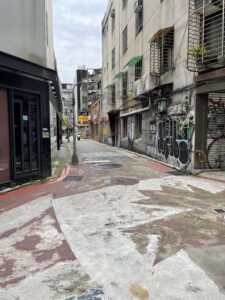
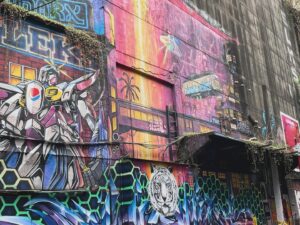
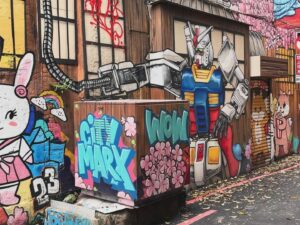
While visiting Taipei we went to the Wanhua district, famous for its amazing street art. It is located in Taipei’s oldest district and is surrounded by history, great food and shopping. While San Francisco, CA has a great collection of murals, we were not prepared for how unique, large, and pristine the street art was in Taipei. In New York and San Francisco there is often layers upon layers of graffiti often obscuring one another in a jumble of imagery. In Taipei, most of the street art was unstructured making you feel like you were walking through a museum rather than an alley. We would see often time see people slowly walking doing an alley as if strolling a museum, pausing at a piece of street art that caught their imagination. Below is a collection of our favorites.
This is a view of the alley call America Street in the Wanhua district where we found most of the art. It is a fun art focused district to visit.
This four-eyed creature in an Elmo costume. We saw three different versions of this image throughout the city.
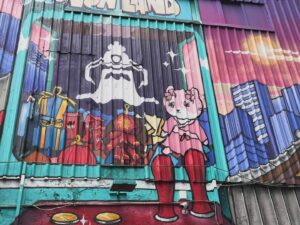
Painted by De_24, this amazing bunny is also frequently seen throughout Taipei. You can check out more of De_24 here.
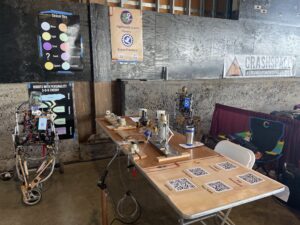
Thanks to everyone who helped this year’s Maker Faire Bay Area be so special! We are looking forward to seeing everyone next year and are already improving our show. Below is a photo our booth before the event started. It is hard to believe over one thousand people visited us over the course three days!
Want to see how our autonomous robots experienced Maker Faire Bay Area? Check out the video below, generated based on the stimuli, emotions, and actions of HipMonsters’ two robots over the course of three days at the Maker Faire.
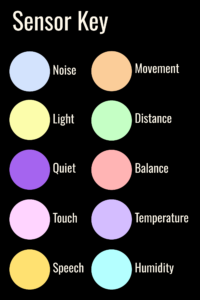
The robots recorded the following sensory data:
💙 Noise: A sudden, loud noise. Represented by the color Blue.
💚 Distance: Motion within 1 foot. Represented by the color Green.
🧡 Movement: Motion within 6 feet. Represented by the color Orange.
💛 Speech: The spoken word “robotics”. Represented by the color Gold.
💗 Touch: Contact on the touch sensor. Represented by the color Pink.
🤖 Frequency of Stimuli: How often or rarely the robots received stimuli. Captured by the Movement of the cube.
🔉 Mood: Happy or overstimulated. Reflected in the choice of Sound.
Turn up the volume of the video! It’s not music you’re hearing, but the robots’ moods given the stimuli.
Since we engaged the Touch sensor at the end of each demo, this means we ran 420 complete demos over 3 days. Our robots have been well socialized!
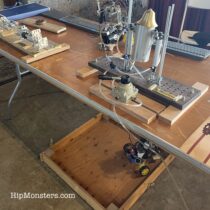
The HipMonster’s team was quiet online over the summer but working hard in our workshop finishing up our educational presentation on robotics, Robot Freedom. Here is a quick preview of our Robot Freedom which you can see in person at this year’s Bay Area Maker Faire.
Please note, this material is provided for informational purposes only and is not a guide on how to create the designs. Please take a look at our disclaimer.
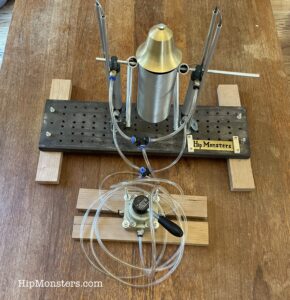
Here is our pneumatic robot designed to put a ring into robotics! Learn how to power a robot by just using your own strength and coordinating with a friend. See how many times you can ring the bell!
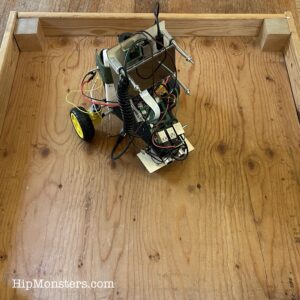
Our DIY robotic car is completely controlled by our emotional AI platform. It uses sensors to learn from its surroundings and go in the right direction. See it navigate the world with emotions and learn how you can build one too.
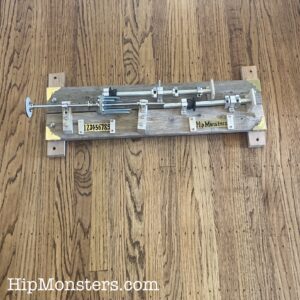
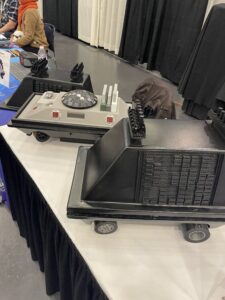
Add, subtract, multiply, and divide using our DIY Leibniz calculator. A steampunk computer that you can build at your home. This calculator can do amazing math with a relatively simple design. Before there was electronics, there was gears!
See the updated Number Three, now a fully autonomous android with emotions. It takes in information from a variety of sensors and processes the information to change its mood. Help it learn to not be afraid of humans!
And Number Two (our centaur robot) has gotten updated as well. The AI platform will soon be available on GitHub so you can build your own emotional AI.
Number Three and Number Two also have a hidden feature when you activate a certain sensor.
We are looking forward to seeing all of you at this year’s Maker Faire!
When designing Robot Freedom, our educational presentation on robotics, the HipMonsters team wanted to make robotics and artificial intelligence (AI) approachable to a mass audience in hopes of inspiring the creators within all of us. To achieve this, the core principles for our AI design were defined by the Hip Monster’s sister team (ages 9 and 12 at the time), namely, robots should have distinct personalities, emotions, curiosity and be first and foremost pieces of art.
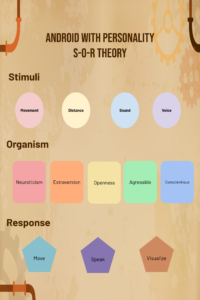
Given these principles, the foundation of our artificial intelligence framework (show above) is based on Stimulus Organism Response (S-O-R) Theory. S-O-R theory is a psychological framework that enables researchers to explore how stimuli (such as a bell) can impact an organism’s responses, (a dog salivating). Like Pavlov’s dog salivating at the sound of a bell, our robots learn and adapt as they experience outside stimuli and are always eager for more. The robot’s AI is driven by five personality traits that govern how they interpret and respond to stimuli. Below is how a signal from a sensor (stimuli) flows through our AI (organism) and results in an action (response).
Central to the robot’s stimuli exploration is a sensor array of ten sensors ranging from sound to touch. When a robot receives a stimulus, it first processes the information based on its preset personality, then uses past experiences to choose a response based on its personality. Below is a color key to the robot’s sensor display panel.
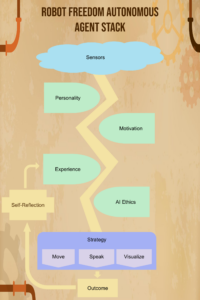
These experiences are weighted based on the outcome of the robot’s actions allowing the robot to adapt responses to new stimuli. The robots can move, change visual effects, or talk using a chatbot. Below is the full software stack used in our robots.
We are delighted to say the Hip Monsters will present Robot Freedom at the this year Bay Area Maker Faire!
Robot Freedom is a celebration of robotics and steampunk designed to teach kids of all ages the basics of robotic design with fun hands-on demonstrations presented by an autonomous android powered by feelings. See how a mechanical mind works, power a music robot with your own strength, and watch how a robot sees a world filled with stimuli!
The HipMonster.com’s team was invited to do a middle school robotics presentation last month to show kids the fun side of robotics and technology. The audience was so awesome and engaged making it a fun experience for everyone.
The theme was how to take over the world using robots, making it fun to keep the students engaged. We used a steampunk template for our slides to match our robot designs and channeled Girl Genius when presenting.
Testing the controllers
The robots got banged up a bit in transport, but nothing got completely broken. The biggest issue was the wires getting pulled out from the Arduinos. Luckily, it was only the breadboard jumper wires which are easy to put back in place. None of the soldered wires were broken which could have been very hard to fix. Breadboard jumpers are designed to be repeatedly taken on and off. They are like tiny colorful USB cables which helps see how what each cable is connected to (this is important because sometimes you can have dozens of wires). When you solder a wire to a controller, it can only be broken to be removed. You solder wires by using melted metal called solder and a really hot device to melt the metal. When a solder connection breaks you need to melt the metal again to reattach.
Fixing the wiring
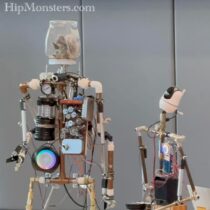
Here we are putting the finishing touches on Number Two and Number Three. All the robots traveled well and were up in running in thirty minutes except for one whose battery was faulty. When transporting batteries, we take extra care not to damage them and use a special carrying case.
We wrote a quick intro for the robots to perform to set the mood. After the intro, we dove right into robotics.
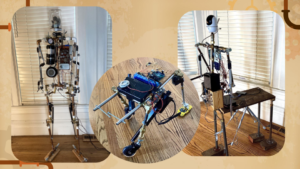
Here are three robot bodies. The first is Number Three. She can move her arms and hands, and talk. The middle is called Number Five. He can walk forward on his own using his four legs. The last is Number Two. He can’t do much, but he can still talk and move part of his arms.
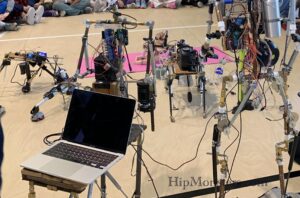
All the robots lined up in the gym
For each robot body, you need to do several things. There needs to be a skeleton, a power source, and something that makes the robot move. When we are thinking of designs for our robots we often think of animals that already exist. We also take inspiration from robots in different books and webcomics.
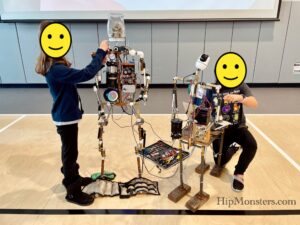
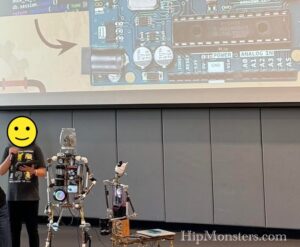
Presenting to the school
Number Four is the most complicated one. It took us over one year to build her, and she is still being modified. Many other robots were also not built all at once but were gradually assembled as we got new ideas.
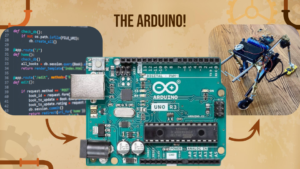
After you build the body, you have to give the robot a brain. in our robots, we use something called an Arduino.
It is basically a tiny computer that you can program to do different things. For our robots, we use Arduino to make the robot walk on its own, so we don’t have to use a remote control. For one robot, the Arduino can also choose the direction that it walks in, and how fast it walks. You can find a simple example here.
We code the Arduino from our computer, then the Arduino sends messages to the robot to control it. We edit the code based on our observations and new ideas.
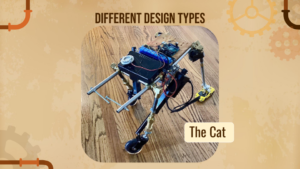
We have many different types of robots that can move their whole body, each type demonstrates a different way of moving. We have the 4-legged walkers, which are our first moving robot design. They are made of metal pipes and have four legs and wheels for feet. We put wheels on their feet because we wanted less resistance and friction, but we didn’t want the robots to just be like a remote-controlled car. We wanted them to walk. The design of the legs and the “knee” has made a big difference.
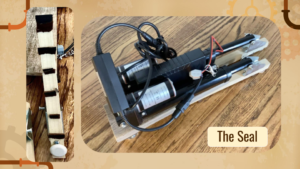
Another design is our Seal robot. This one is very different, as it only has two legs and no wheels. The legs pull themselves forward, powered by linear actuators. To make sure that the legs don’t just go backwards and stay in place, we put wedge-shaped bits of foam at the bottom of the seal’s legs. When the seal moves forward, the wedges give no resistance, but when the legs pull back, the wedges stop them.
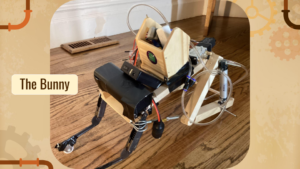
The next robot is our Bunny robot. The bunny robot is also unique because it was originally designed to hop. The two back legs push it forward, thanks to the springs. This one is powered by air and pistons, so you can get the sudden jolt that is harder to achieve with linear actuators. This robot is also one of the only robots made mostly out of wood. We took the idea for the legs from our wooden toys.
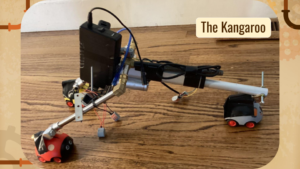
This is the Kangaroo. The kangaroo’s main difference besides the number of legs is the feet. The feet are small animal toys, designed to only go in one direction so they can move forward more efficiently. The back leg powers the whole robot, and we used linear actuators.
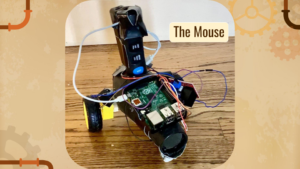
The last robot is the Mouse. The mouse is just a broken blow-dryer attached to wheels from some old toys. It is very simple, so we decided to make it walk on its own, completely uncontrolled and completely randomly, controlled by the Arduino. You can see the code here.
The mouse in action
Sorry, this photo was blurry, but the mouse was super fast that day-well charged batteries.
We want to give a big thanks to all who came to our robotics presentation, and everyone who helped and supported us! this was our first big presentation, and we couldn’t be more happy with how it turned out!


 Here are some more rocks! We love looking at and picking up all of the different rocks. One particular favorite is a desert rose crystal. We like then because they are very beautiful and remind us of a rose. We also love bismuth because it reminds us of


 And a friendly skeleton watches over the store while you explore!


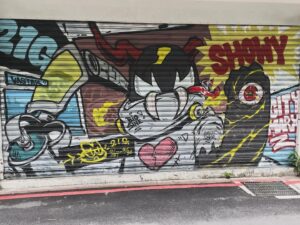
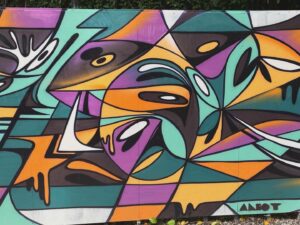 The artist is unknown.