Number 10 Gets A Screen

We have started upgrading all our robot to run the new RobotFreedom.AI framework. For Number Ten, the main missing piece was a screen. Some of our early designs were not built with a screen in mind and adapting the design has taken a few iterations.

Please note, this material is provided for informational purposes only and is not a guide on how to create the designs. Please take a look at our disclaimer.

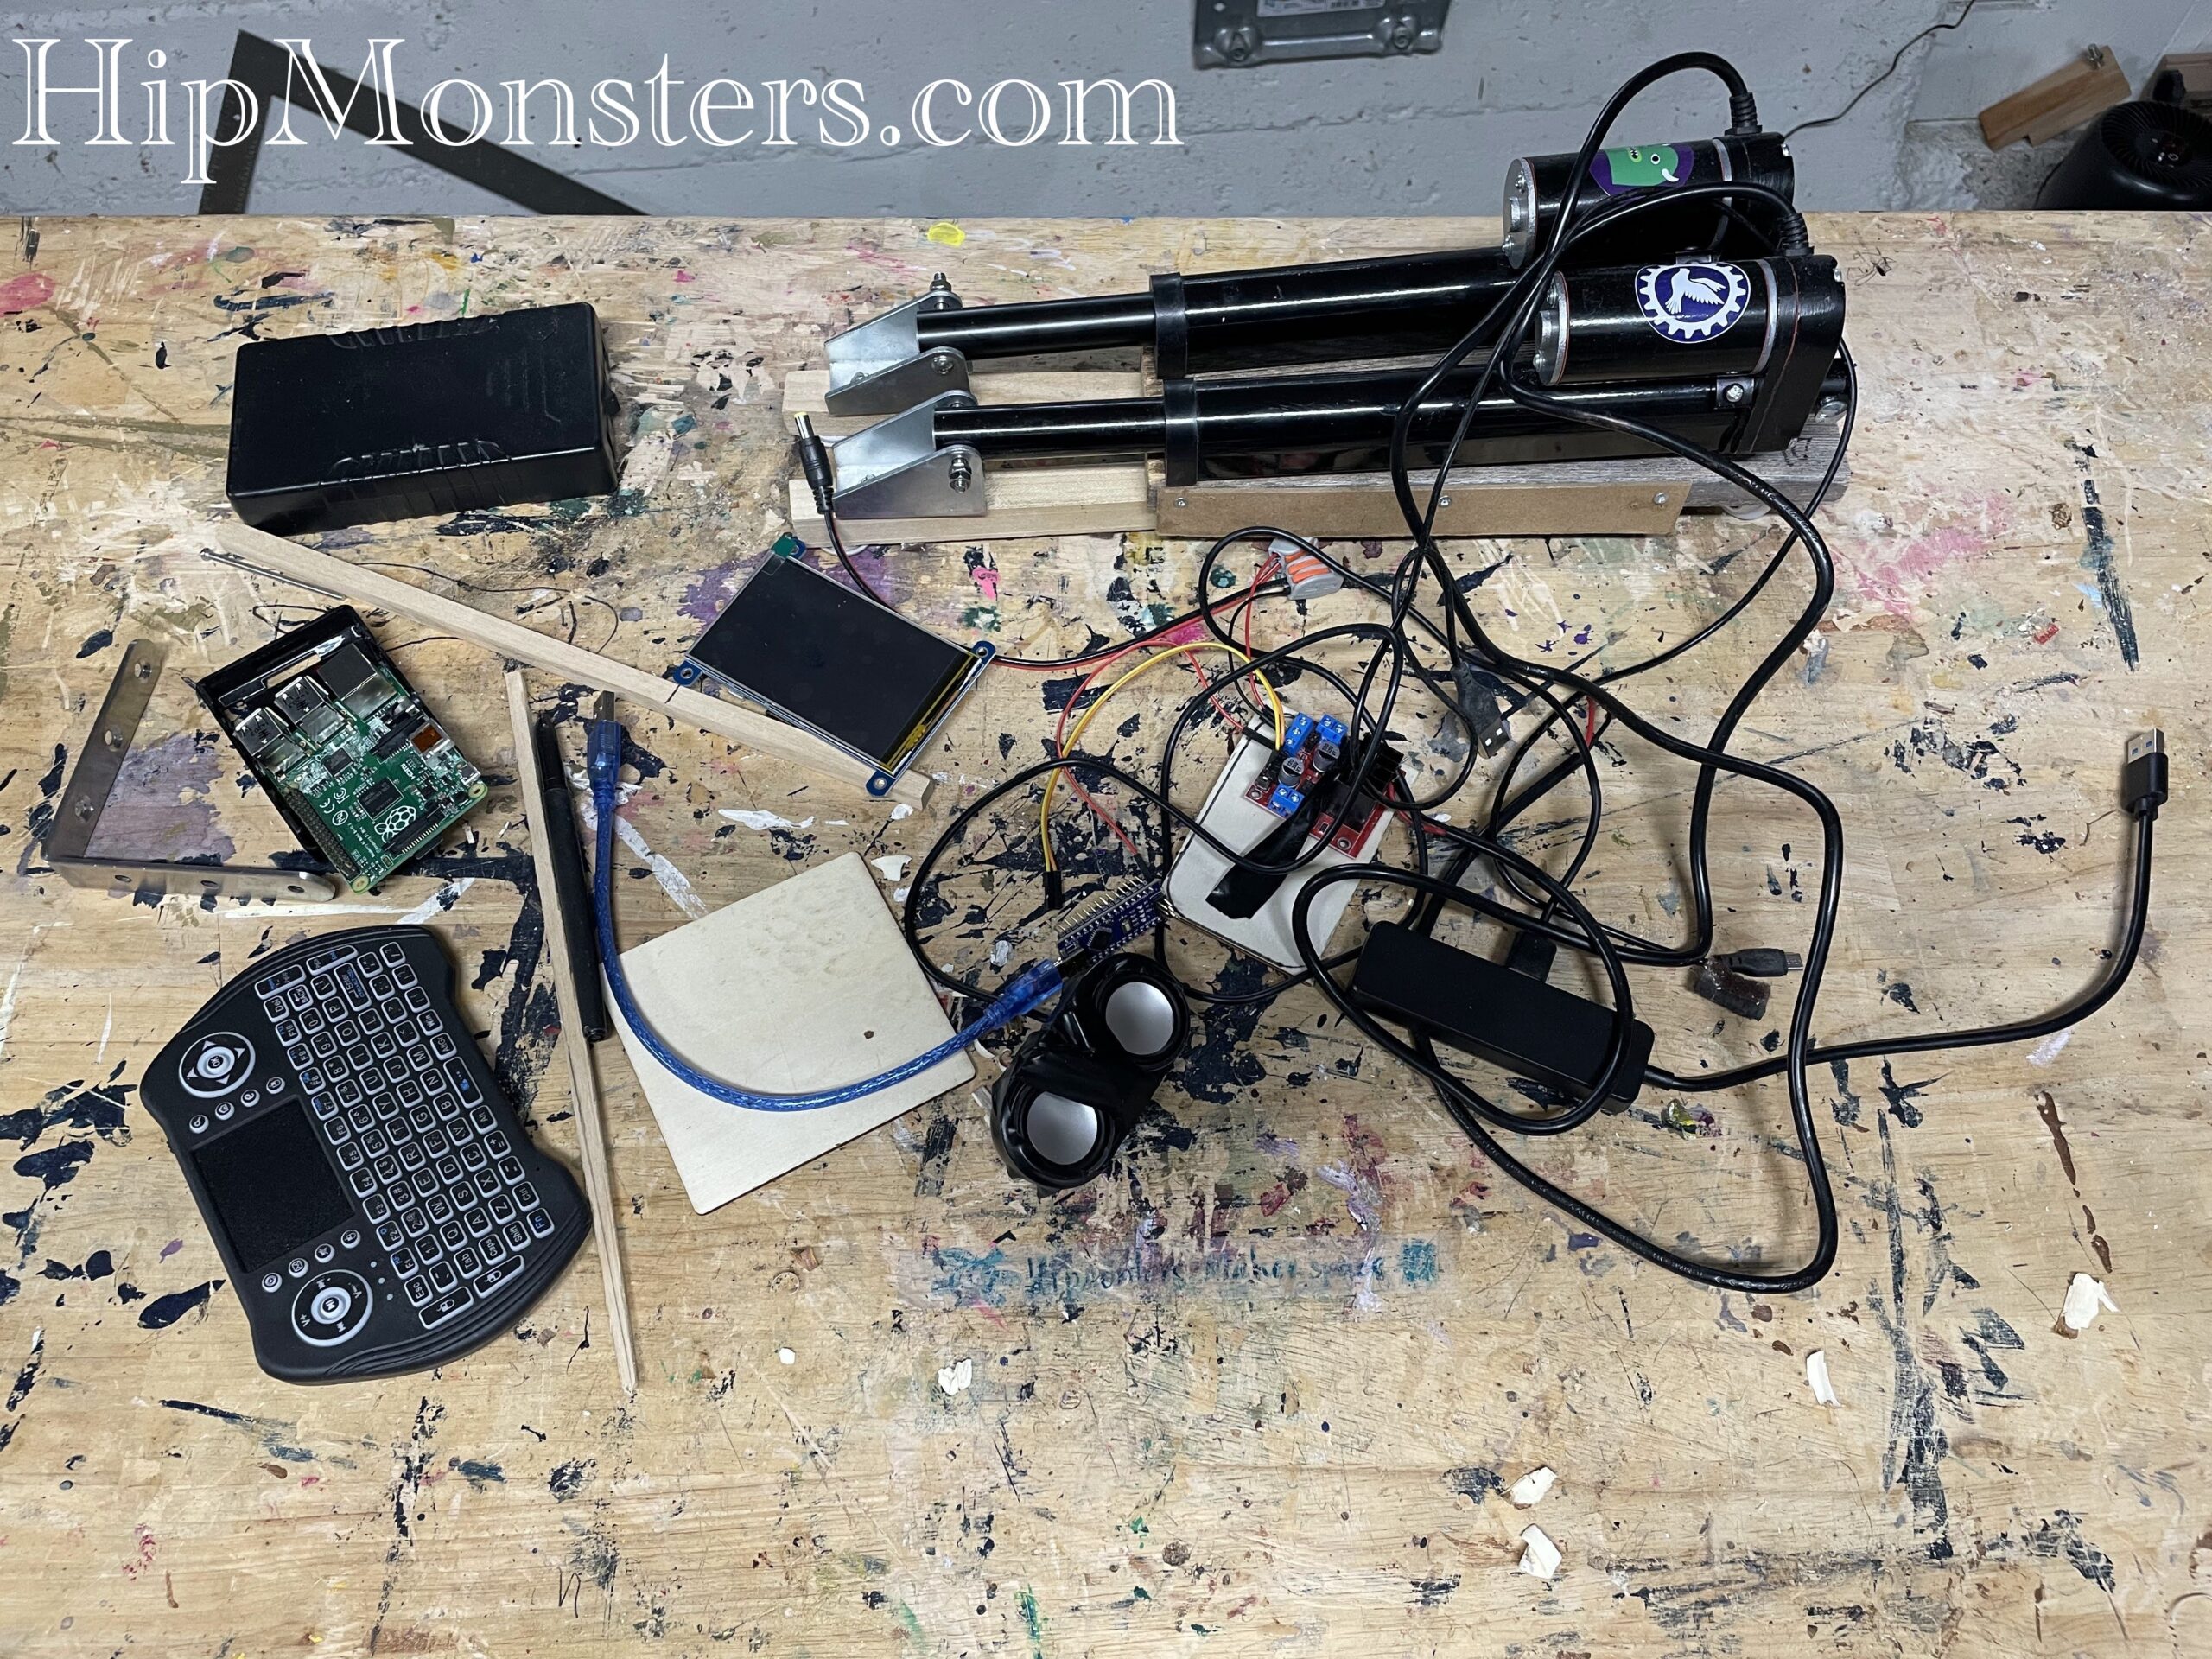
Here is a list of some materials and components used:

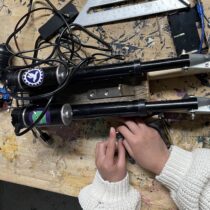
Number Ten was a tricky design to fit a screen on and keep to its original design. After many attempts we settled on using a L-Bracket placed at the front the body to mount the screen.

Now we reassembled the legs onto the body. Number Ten was one of several experiments the Hip Monster’s sister team built to come up with the most unusual way to move a robot. The robot moves forward, left and right by sliding one foot forward. On the bottom of each foot is edge shaped gripers that provide traction when pushed against but slide when pushed forward.

The screen is light enough to only need a few attachments to hold it in place. For added support we used a wire at the top of the screen to keep it secure while moving. Number Ten has never fallen forward so we need less protection for the electronics and screens than some of out other designs.

Our we assemble the various components Number Ten will need. We recommend using a usb hub  for the wireless keyboard dongle. If you have several robots you will want to reuse the keyboard and will need quick access to the dongle. Typically, once we settle on a final layout for the RaspberryPi it is in a secure but difficult to each place making removing the dongle difficult. For people with less than perfect eye sight we recommend using a magnifying glass and bright lights when connection the GPIO pin to the RaspberryPi.

YouTube player

And here is a quick video of Number Ten display screen working. It is a light weight version of our main display better suited for older RaspberryPis.

YouTube player

Happy creating!

Updates to RobotFreedom.AI

Since our last update at Maker Faire, we’ve made significant improvements to our robot lineup, focusing on increasing autonomy, human interactions and emotional expression. Core to this is our AI framework, RobotFreedom.AI now available on GitHub.

The design principle for our autonomous AIs ():

  1. Runs completely locally on a RaspberryPi (no third-party API call out)
  2. Has distinctive personalities based on the big 5 personality traits
  3. Learns from interactions (initiated when in sleep mode)
  4. Makes informed decisions based on a knowledge graph
  5. Can carry on a conversation between themselves and with a human

To achieve this we used an Agentic AI framework rather than just tapping direction into a chat bot. By having a core AI that was designed to meet our specifics goals we had more control of its behavior and could also directly see how the AI worked in real-time which provide to be a great educational tool.

One of the key upgrades is the addition of machine learning algorithms, which enable the robots to learn from their interactions and adapt quickly adapt new situations. This allows them to become even more autonomous in their decision-making processes, making them more efficient and effective in completing tasks.

We’ve also made notable strides in expanding the robots’ interactive capabilities, incorporating features such as voice recognition, gesture control, and tactile feedback. These enhancements enable users to engage with the robots on a deeper level, fostering a more immersive and engaging experience.

Some of the specific updates include:

* Advanced sensor arrays for improved navigation and obstacle detection

* Enhanced machine learning algorithms for adaptive decision-making

* Voice recognition and speech-to-text capabilities

* Tactile feedback mechanisms for haptic interaction

These updates have significantly enhanced the robots’ autonomy, interactivity, and overall user experience. We’re excited to continue refining our designs and pushing the boundaries of what’s possible with robotics and AI.

We have been busy working on our next release of our robot software platform

Major features:

  • Robots can coordinate actions using web socket communication
  • Dedicated http server for each robot
  • Added Piper TTS for voice
  • Added Vosk for speech recognition
  • Added Ollama and LangChain for chat bot.
  • Improved random movement generator.
  • Tons of bug fixes
  • Improved debug mode
  • Low memory mode for RaspberryPis 1-3

Tested on OsX and RaspberryPi 1-5.

You can see our Robotic AI platform in action here.

Happy creating!

Arduino Robotic Controller Software Update

The RobotFreedom robots are controlled by two code bases. The first runs on a RaspberryPi and is written in Python. You can read more about it here. The second code base controls the movements and lights on the robot. It is written in C and runs on a Arduino. This article will get you started on developing with that code base. You can download it GitHub.

Please note, this material is provided for informational purposes only and is not a guide on how to create the designs. Please take a look at our disclaimer.

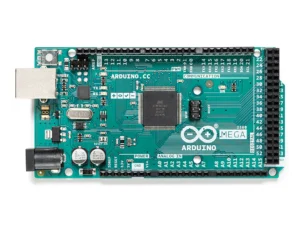
The movement controller is designed to be light and simple compared to the main AI code-base and is ideal for a beginner. The focus is to provide an interface for a human or AI to control a robot’s moving components (arms, legs and wheels). We use a Arduino Mega Board because it has a plenty of digital pin to attach our components to. Below is an image of a Arduino Mega board.

Arduino’s can be controlled via serial communication through a USB port or you can code it to run independently. Our robotic walkers are controlled only by an Arduino. This project is intended to be controlled by an AI installed on a RaspberryPi.

The purpose of the program is to receive incoming messages and perform the requested action. For example ‘a’ means raise the left arm. When the program receives an ‘a’ command it sends a command to a H-Bridge which then send power to a linear actuator to raises the left arm.

To start, install the Arduino IDE on your preferred development OS. Linux, OXS and Windows is supported. You can get the code here.

Next, download the required library and copy them to your development folder.

Adafruit_BusIO
Adafruit_I2CDevice
Adafruit-GFX-Library
FastLED

Launch the Arduino IDE and from the menu bar select:
Sketch>Include Library>Add Zip Library…

Launch the Arduino IDE and from the menu bar select:
Sketch>Include Library>Add Zip Library…

Then point to one of the zip files you have downloaded. Repeat for each required library.

To open the project, double click on the movement_controller.ino file and the Arduino IDE should automatically launch. If it does not launch you can load the sketch by selecting File>Open then navigate to your project file.
Now choose a board type. When you connect your Arduino board it should be auto-detected by the IDE. For some brands you may have to manual select it from the combo box. For off-brand Arduino we recommend searching forums for the best match. Many specify incorrect boards in their descriptions.

Next select >Sketch>Verify Compile. At the bottom of the IDE a console will appear and provide a detailed log. If you missed any libraries you will receive an error message. Loading any required libraries and try again.

Once the code is compiled select sketch>upload to deploy your code.

Below is a list of the components the code can control:

H-Bridge
FastLED
Linear Actuator

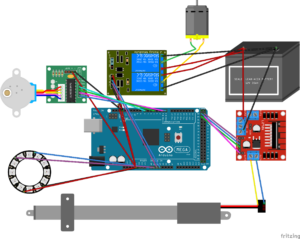
The image below is the wiring for the Arduino:

To test select Tools>Serial Monitor from the main menu. At the bottom of the IDE a new tab titled “Serial Monitor” will appear. From this console you can directly communicate with the Arduino.

 In the console window type “5”. You should see a response from the Arduino in the console and if the LED is connected to the Arduino it should turn white and flash in a circular pattern.

Now you can control your own robot!
Happy Creating!


Maker Faire Bay Area Robot’s View

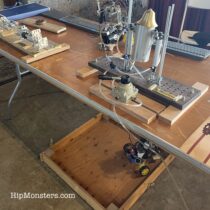
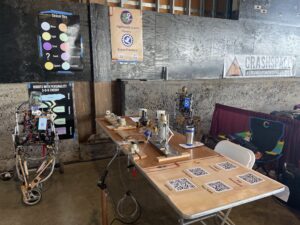
Thanks to everyone who helped this year’s Maker Faire Bay Area be so special! We are looking forward to seeing everyone next year and are already improving our show. Below is a photo our booth before the event started. It is hard to believe over one thousand people visited us over the course three days!  

Maker Faire Bay Area

Want to see how our autonomous robots experienced Maker Faire Bay Area? Check out the video below, generated based on the stimuli, emotions, and actions of HipMonsters’ two robots over the course of three days at the Maker Faire.

The robots recorded the following sensory data:

💙 Noise: A sudden, loud noise. Represented by the color Blue.

💚 Distance: Motion within 1 foot. Represented by the color Green.

🧡 Movement: Motion within 6 feet. Represented by the color Orange.

💛 Speech: The spoken word “robotics”. Represented by the color Gold.

💗 Touch: Contact on the touch sensor. Represented by the color Pink.

🤖 Frequency of Stimuli: How often or rarely the robots received stimuli. Captured by the Movement of the cube.

🔉 Mood: Happy or overstimulated. Reflected in the choice of Sound.

Turn up the volume of the video! It’s not music you’re hearing, but the robots’ moods given the stimuli.

Since we engaged the Touch sensor at the end of each demo, this means we ran 420 complete demos over 3 days. Our robots have been well socialized!

YouTube player

Happy Creating!

Getting Started with Raspberry PI

Originally, we set up this site to focus on woodcrafting and painting but as our interests grew, we have increasingly used Raspberry Pis to add motion and life into our work. This post will get you started using Raspberry Pi’s in your creations.

Please note, this material is provided for informational purposes only and is not a guide on how to create the designs. Please take a look at our disclaimer.

Why Raspberry Pi?

  1. Powerful computing platform with easy-to-use languages.
  2. Low energy consumption and runs quietly and cooly.
  3. Rich online support and user base.
  4. Has 26 pins built in enabling rapid integration with Internet of Things (IoT) technology.
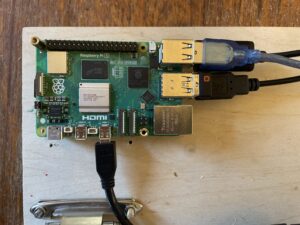
RaspberryPi 5

Peripherals

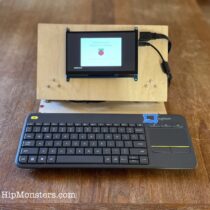
Today, most people developed on a laptop or tablet, but Raspberry Pi’s require old fashion peripherals: power cables, screen, keyboard and mouse. You need to setup a physical development environment and make sure you have all the necessary peripherals. Newer Raspberry Pi uses a Micro HDMI port so you will need a converter. We do a lot of coding on the couch so built a makeshift laptop as seen below.  
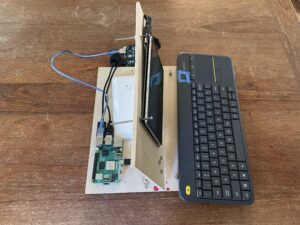
DIY RaspberryPi Laptop

A side view of our Raspberry Pi laptop.
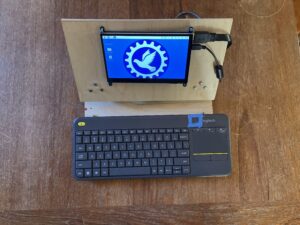
DIY RaspberryPi Laptop

A front view of our laptop.

A mouse can get some to get use to so we recommend a wireless keyboard (seen above) with a built-in trackpad. One plus is the keyboard + trackpad only uses up one USB port.

The Hard Drive

A Raspberry Pi’s OS is stored on a Micro SD. To start we recommend getting two with at least 64 GB. If you do any images or sound the drive fills up fast. You will also need at least two readers. One USB A for the Raspberry Pi when you transfer code and one for your other machine to build the OS image from.
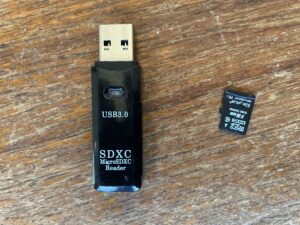
SD card and reader

Building the OS Image

You can buy Micro SD cards with built in OS. If you do not have a laptop or desktop that is you only real option. You can also build your own OS image using tool provided by Raspberry Pi. You dan download it here: raspberrypi.com/software.

We recommend modifying the advance setting to pre-configure your login and Wi-Fi password.

Booting the Device

Make sure to use the appropriate power supply as specified by RaspBerryPi. Depending on the version, booting can take a while. Once it has completed booting you should see a screen that looks like most standard desktop environments.
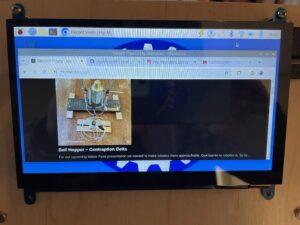
Linux Desktop

Raspberry Pi’s OS is ARM version of Linux. If you have used Linux most of the standard tools will be available. If you have only used Windows or OSX the environment should seem very familiar. All the desktop environments follow the same basic principles. If you have never used a desktop environment this is a great place to start!

Configuring Your Environment

The keyboard defaults to UK. If you are not in the UK many of the keys will not work as expected. In Preferences, open up the Mouse and Keyboard Setting then click the Keyboard layout button at the bottom. In the combo box choose the appropriate country.

We also recommend a smaller or not image for the background to use less memory.

Developing Your Next Big Thing!

We started using Scratch as a development tool. If that works for you and makes sense keep using it! Here is a link on how to install it on a Raspberry PI.

We have migrated to mow using Python and C++. To write code we use the Geany Programmer’s Editor. It lacks some features of Visual Studio Code (what we develop on in Windows and OSX) but has a light foot print.

Typically, we write code for a Raspberry Pi on both a MacBook and the Raspberry Pi itself. We do find the MacBook is similar enough environment we do not need to change our code too much. If you look at our code in GitHub we you we often have different logic based on which environment the code is run on. Note: there are some packages that only work on Raspberry Pi such as interfaces to sensors. In these sections of the code, we have non-functioning stub if the platform is OSX.

We transfer code using the SD reader. Both OSX and Linux auto-detect SD cards when attacked but with Linux it can take a bit so be patient. Also, sometimes Linux cannot write to large SD card so try a small on first.

Our next post will dive deeper into the basic of programming Python on a Raspberry Pi. For now, if you have never used Linux or a desktop environment we recommend just browsing the Web using Chromium (the open source base to Chrome) to familiarize yourself.

Happy Creating!


AI as Art

When designing Robot Freedom, our educational presentation on robotics, the HipMonsters  team wanted to make robotics and artificial intelligence (AI) approachable to a mass audience in hopes of inspiring the creators within all of us. To achieve this, the core principles for our AI design were defined by the Hip Monster’s sister team (ages 9 and 12 at the time), namely, robots should have distinct personalities, emotions, curiosity and be first and foremost pieces of art.

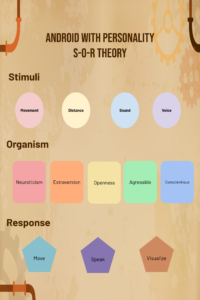
Robot Freedom's AI platform using S-O-R theory.

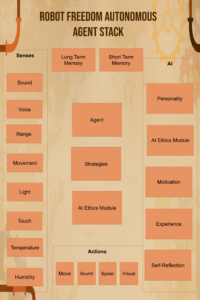
Given these principles, the foundation of our artificial intelligence framework (show above) is based on Stimulus Organism Response (S-O-R) Theory. S-O-R theory is a psychological framework that enables researchers to explore how stimuli (such as a bell) can impact an organism’s responses, (a dog salivating). Like Pavlov’s dog salivating at the sound of a bell, our robots learn and adapt as they experience outside stimuli and are always eager for more. The robot’s AI is driven by five personality traits that govern how they interpret and respond to stimuli. Below is how a signal from a sensor (stimuli) flows through our AI (organism) and results in an action (response).

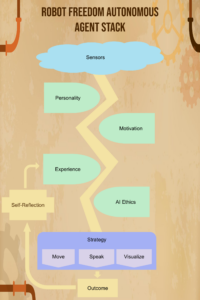
Robot Freedom's artificial intelligence platform using S-O-R theory. Agent Stack

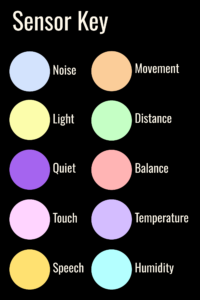
Central to the robot’s stimuli exploration is a sensor array of ten sensors ranging from sound to touch. When a robot receives a stimulus, it first processes the information based on its preset personality, then uses past experiences to choose a response based on its personality. Below is a color key to the robot’s sensor display panel.
Robot Freedom's sensor color chart.


These experiences are weighted based on the outcome of the robot’s actions allowing the robot to adapt responses to new stimuli. The robots can move, change visual effects, or talk using a chatbot. Below is the full software stack used in our robots.

Robot Freedom's AI platform using S-O-R theory full stack

All the processing is run on a Raspberry Pi and you can download if on our GitHub. Come see this in action at this year’s Bay Area Maker’s Faire!

Happy creating!