Maker Faire Bay Area Robot’s View

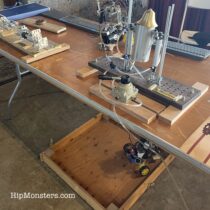
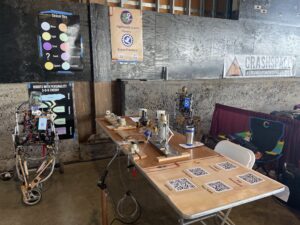
Thanks to everyone who helped this year’s Maker Faire Bay Area so special! We are looking forward to seeing everyone next year and are already improving our show. Below is a photo our booth before the event started. It is hard to believe over one thousand people visited us over the course three days!  

Maker Faire Bay Area

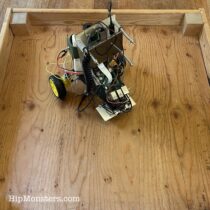
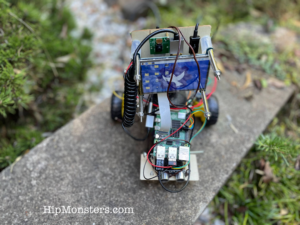
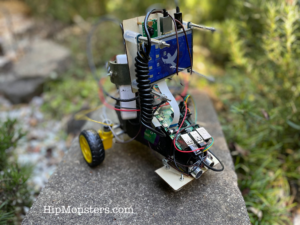
Want to see how our autonomous robots experienced Maker Faire Bay Area? Check out the video below, generated based on the stimuli, emotions, and actions of HipMonsters’ two robots over the course of three days at the Maker Faire.

The robots recorded the following sensory data:

💙 Noise: A sudden, loud noise. Represented by the color Blue.

💚 Distance: Motion within 1 foot. Represented by the color Green.

🧡 Movement: Motion within 6 feet. Represented by the color Orange.

💛 Speech: The spoken word “robotics”. Represented by the color Gold.

💗 Touch: Contact on the touch sensor. Represented by the color Pink.

🤖 Frequency of Stimuli: How often or rarely the robots received stimuli. Captured by the Movement of the cube.

🔉 Mood: Happy or overstimulated. Reflected in the choice of Sound.

Turn up the volume of the video! It’s not music you’re hearing, but the robots’ moods given the stimuli.

Since we engaged the Touch sensor at the end of each demo, this means we ran 420 complete demos over 3 days. Our robots have been well socialized!

YouTube player

Happy Creating!

Getting Started with Raspberry PI

Originally, we set up this site to focus on woodcrafting and painting but as our interests grew, we have increasingly used Raspberry Pis to add motion and life into our work. This post will get you started using Raspberry Pi’s in your creations.

Please note, this material is provided for informational purposes only and is not a guide on how to create the designs. Please take a look at our disclaimer.

Why Raspberry Pi?

  1. Powerful computing platform with easy-to-use languages.
  2. Low energy consumption and runs quietly and cooly.
  3. Rich online support and user base.
  4. Has 26 pins built in enabling rapid integration with Internet of Things (IoT) technology.
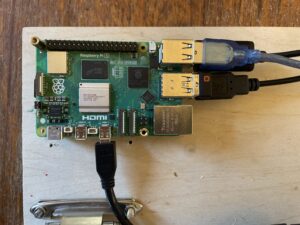
RaspberryPi 5

Peripherals

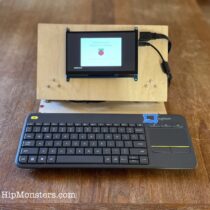
Today, most people developed on a laptop or tablet, but Raspberry Pi’s require old fashion peripherals: power cables, screen, keyboard and mouse. You need to setup a physical development environment and make sure you have all the necessary peripherals. Newer Raspberry Pi uses a Micro HDMI port so you will need a converter. We do a lot of coding on the couch so built a makeshift laptop as seen below.  
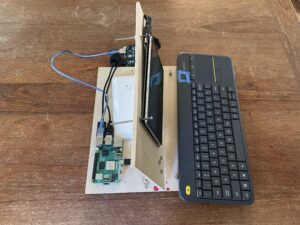
DIY RaspberryPi Laptop

A side view of our Raspberry Pi laptop.
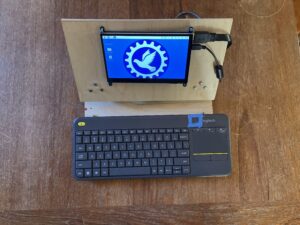
DIY RaspberryPi Laptop

A front view of our laptop.

A mouse can get some to get use to so we recommend a wireless keyboard (seen above) with a built-in trackpad. One plus is the keyboard + trackpad only uses up one USB port.

The Hard Drive

A Raspberry Pi’s OS is stored on a Micro SD. To start we recommend getting two with at least 64 GB. If you do any images or sound the drive fills up fast. You will also need at least two readers. One USB A for the Raspberry Pi when you transfer code and one for your other machine to build the OS image from.
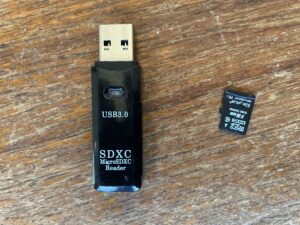
SD card and reader

Building the OS Image

You can buy Micro SD cards with built in OS. If you do not have a laptop or desktop that is you only real option. You can also build your own OS image using tool provided by Raspberry Pi. You dan download it here: raspberrypi.com/software.

We recommend modifying the advance setting to pre-configure your login and Wi-Fi password.

Booting the Device

Make sure to use the appropriate power supply as specified by RaspBerryPi. Depending on the version, booting can take a while. Once it has completed booting you should see a screen that looks like most standard desktop environments.
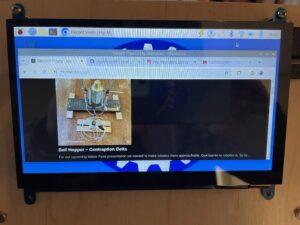
Linux Desktop

Raspberry Pi’s OS is ARM version of Linux. If you have used Linux most of the standard tools will be available. If you have only used Windows or OSX the environment should seem very familiar. All the desktop environments follow the same basic principles. If you have never used a desktop environment this is a great place to start!

Configuring Your Environment

The keyboard defaults to UK. If you are not in the UK many of the keys will not work as expected. In Preferences, open up the Mouse and Keyboard Setting then click the Keyboard layout button at the bottom. In the combo box choose the appropriate country.

We also recommend a smaller or not image for the background to use less memory.

Developing Your Next Big Thing!

We started using Scratch as a development tool. If that works for you and makes sense keep using it! Here is a link on how to install it on a Raspberry PI.

We have migrated to mow using Python and C++. To write code we use the Geany Programmer’s Editor. It lacks some features of Visual Studio Code (what we develop on in Windows and OSX) but has a light foot print.

Typically, we write code for a Raspberry Pi on both a MacBook and the Raspberry Pi itself. We do find the MacBook is similar enough environment we do not need to change our code too much. If you look at our code in GitHub we you we often have different logic based on which environment the code is run on. Note: there are some packages that only work on Raspberry Pi such as interfaces to sensors. In these sections of the code, we have non-functioning stub if the platform is OSX.

We transfer code using the SD reader. Both OSX and Linux auto-detect SD cards when attacked but with Linux it can take a bit so be patient. Also, sometimes Linux cannot write to large SD card so try a small on first.

Our next post will dive deeper into the basic of programming Python on a Raspberry Pi. For now, if you have never used Linux or a desktop environment we recommend just browsing the Web using Chromium (the open source base to Chrome) to familiarize yourself.

Happy Creating!


Number One On Its Own

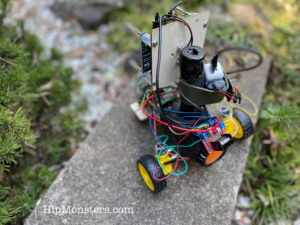
Number One looks very simple, it’s just a burnt out hair drier with wheels. As out first design we opted for a wheeled robot that followed a more traditional form, but it has been repeatedly updated over the years and now is completely autonomous with a mind of its own, making it one of our most complex robots. Powered by a RaspberryPi, our new Number One is now a Edge AI mobile sensor.

Please note, this material is provided for informational purposes only and is not a guide on how to create the designs. Please take a look at our disclaimer.

DIY wheeled robot

The handle of the blow drier servers as a functional hub for the electronic component. The two batteries (one for the RaspberryPi and one for the motors) are attached to the back to allow for quick replacement. The camera is mounted at the top to provide a good overall view. The display, which is mostly for show, is forward facing. We added “bumpers” to the screen on each counter to help protect it in from falling or bumping in to something. The first screen hit a end table and developed a crack, which convinced us that it needed some armor.

DIY Wheeled Robot RaspberryPi

To protect the range finder, we added wooden bumper. Originally the range sensor had no protection, but after a few good hits we decided a bumper was a good idea. The range finder has proven to be sturdy but the wires to tend to fall off.

DIY Wheeled Robot RaspberryPi

Above is a back view. When we first built Number One it the components were completely attached using electrical tape. While this worked surprisingly well, it did not look good. Most components are now bolted on or attached using leather to help the robot look more aesthetic.

DIY Wheeled Robot RaspberryPi

The RaspberryPi is attached in front for easy access. The USB and other access ports are easily accessed allowing for quick repairs. We use a wireless keyboard to control the RaspberryPi. While the robot is autonomous (it makes decisions on its own) when it first gets power the AI part of the robot does not turn on. The robot can only become active after we execute a command. The original model turned on automatically, but that proved to be a bit of a headache when something went wrong.

Robot layout

The above image is the layout design using software from Fritzing.org. This is a far simpler layout that what we made for Number Two and Number Three. We may add more sensors over time, but to enable a fast response and to reduce power needs we decided to keep the number of sensors to a minimum.  Another difference is we are not using an Arduino to control the movement. For beginners this is a better design to learn with.

Here is Number One in action! Come see it live at this year’s Bay Area Maker Faire! 

You can download the code from our GitHub.

Happy Creating!